Auto-EEG-Analysis
First report on Windows
This walkthrough covers the MNE-based route. For the 0.1.3 preview route using native MATLAB/EEGLAB without Python, and the DeepSeek connection through Claude Code, see MATLAB setup.
Use this walkthrough for Windows MATLAB/EEGLAB → AEA → a coding client → an HTML report. MATLAB supplies the menu and dataset; Python/MNE performs the import checks and most analysis. Codex CLI and Claude Code are separate client choices. Both routes have completed the fixed four-epoch synthetic Windows integration test, including independent result checks, replay and opening the generated report from EEGLAB. This does not establish real EEG analysis reliability or unattended first-time setup.
1. Prepare the analysis environment
Install Git for Windows and Miniconda. Open Miniconda PowerShell Prompt, then run:
git clone https://github.com/dengzhe-hou/auto-eeg-analysis.git
cd auto-eeg-analysis
conda env create -f environment.yml
conda activate aeais
python -c "import sys, mne; print(sys.executable); print(mne.__version__)"
Keep the printed Python path. Reopen this prompt and activate aeais for later sessions.
2. Install and sign in to one client
Reuse a working installation. Otherwise, choose one official installer in PowerShell.
powershell -ExecutionPolicy ByPass -c "irm https://chatgpt.com/codex/install.ps1 | iex"
irm https://claude.ai/install.ps1 | iex
After installation, open a new prompt, return to the AEA folder and activate
aeais. Run codex --version then codex, or claude --version then claude,
and follow the client’s login prompts. Retain your chosen model and permissions.
An account or API connection is separate from the Python environment.
On Claude Code’s first launch, select a terminal text style (for example, Dark mode) and complete sign-in before returning to EEGLAB. Check the CLI login separately, even if you already use the Claude Desktop app:
claude auth status
Continue when it reports "loggedIn": true. A terminal waiting at the initial
style or sign-in screen has not started the study analysis.
3. Connect the skills
From the AEA folder, run the command matching your client:
python tools/install_skills.py --agent codex
or:
python tools/install_skills.py --agent claude
Windows uses directory junctions; Developer Mode is not required.
4. Fill in the EEGLAB settings
Update an existing checkout with git pull --ff-only first. Copy its
extensions/eeglab/aea folder into your EEGLAB plugins folder, or extract the
matching preview ZIP there. Remove any previous AEA plugin copy and restart
EEGLAB. Both the MATLAB adapter and the checkout’s Python bridge are needed;
see preview versions and validation.
Run these in the activated PowerShell prompt to find the settings:
(Get-Location).Path
python -c "import sys; print(sys.executable)"
where.exe codex
For Claude, replace the last command with where.exe claude.
Open Tools → AEA → Settings:
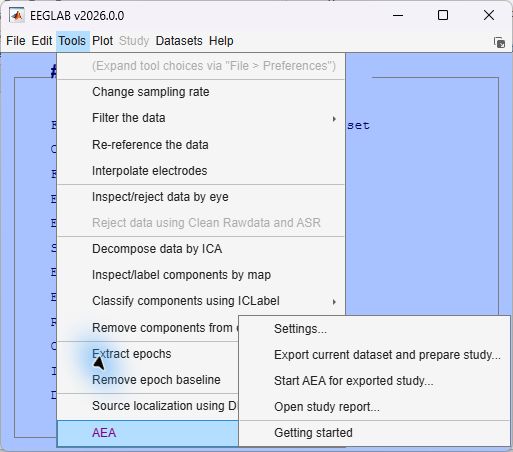
| Field | What to paste |
|---|---|
| AEA checkout folder | The first command’s folder, containing AGENT_GUIDE.md |
| Python executable | The full python.exe path, not the Conda folder |
| Coding assistant | codex or claude |
| Assistant executable | The working client’s .exe or .cmd path |
| Analysis backend | mne for this walkthrough |
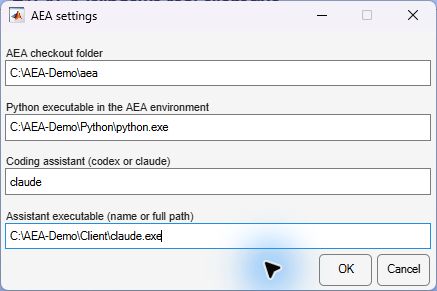
The screenshot uses neutral demonstration paths. Paste the paths from your own setup commands, including your own Python and client executable locations. It shows the earlier four-field dialog; version 0.1.3 adds the backend field.
5. Export, plan and run
- Load your dataset in EEGLAB. Continuous data and at least two epochs are supported.
- Choose Export current dataset and prepare study, select a new folder and choose
customor a matching recipe. - Choose Start AEA for exported study. In the opened client, explain your study and missing choices, for example:
Inspect the exported dataset and its processing history. Help me specify the
study question, event meanings, channels, measurements and statistics in an
analysis plan. Ask about missing choices and wait for my approval before their
dependent computations. Keep previously approved choices.
Approve the completed plan, then request execution. Terminal permission prompts remain governed by the client’s existing settings.
6. Open the result
After the client creates report-stage/report.html, choose Open study report
and select that study folder. Inspect the saved plan, code, results and checks.
The original EEGLAB dataset is retained; generated analysis is not automatically
loaded back into EEG.
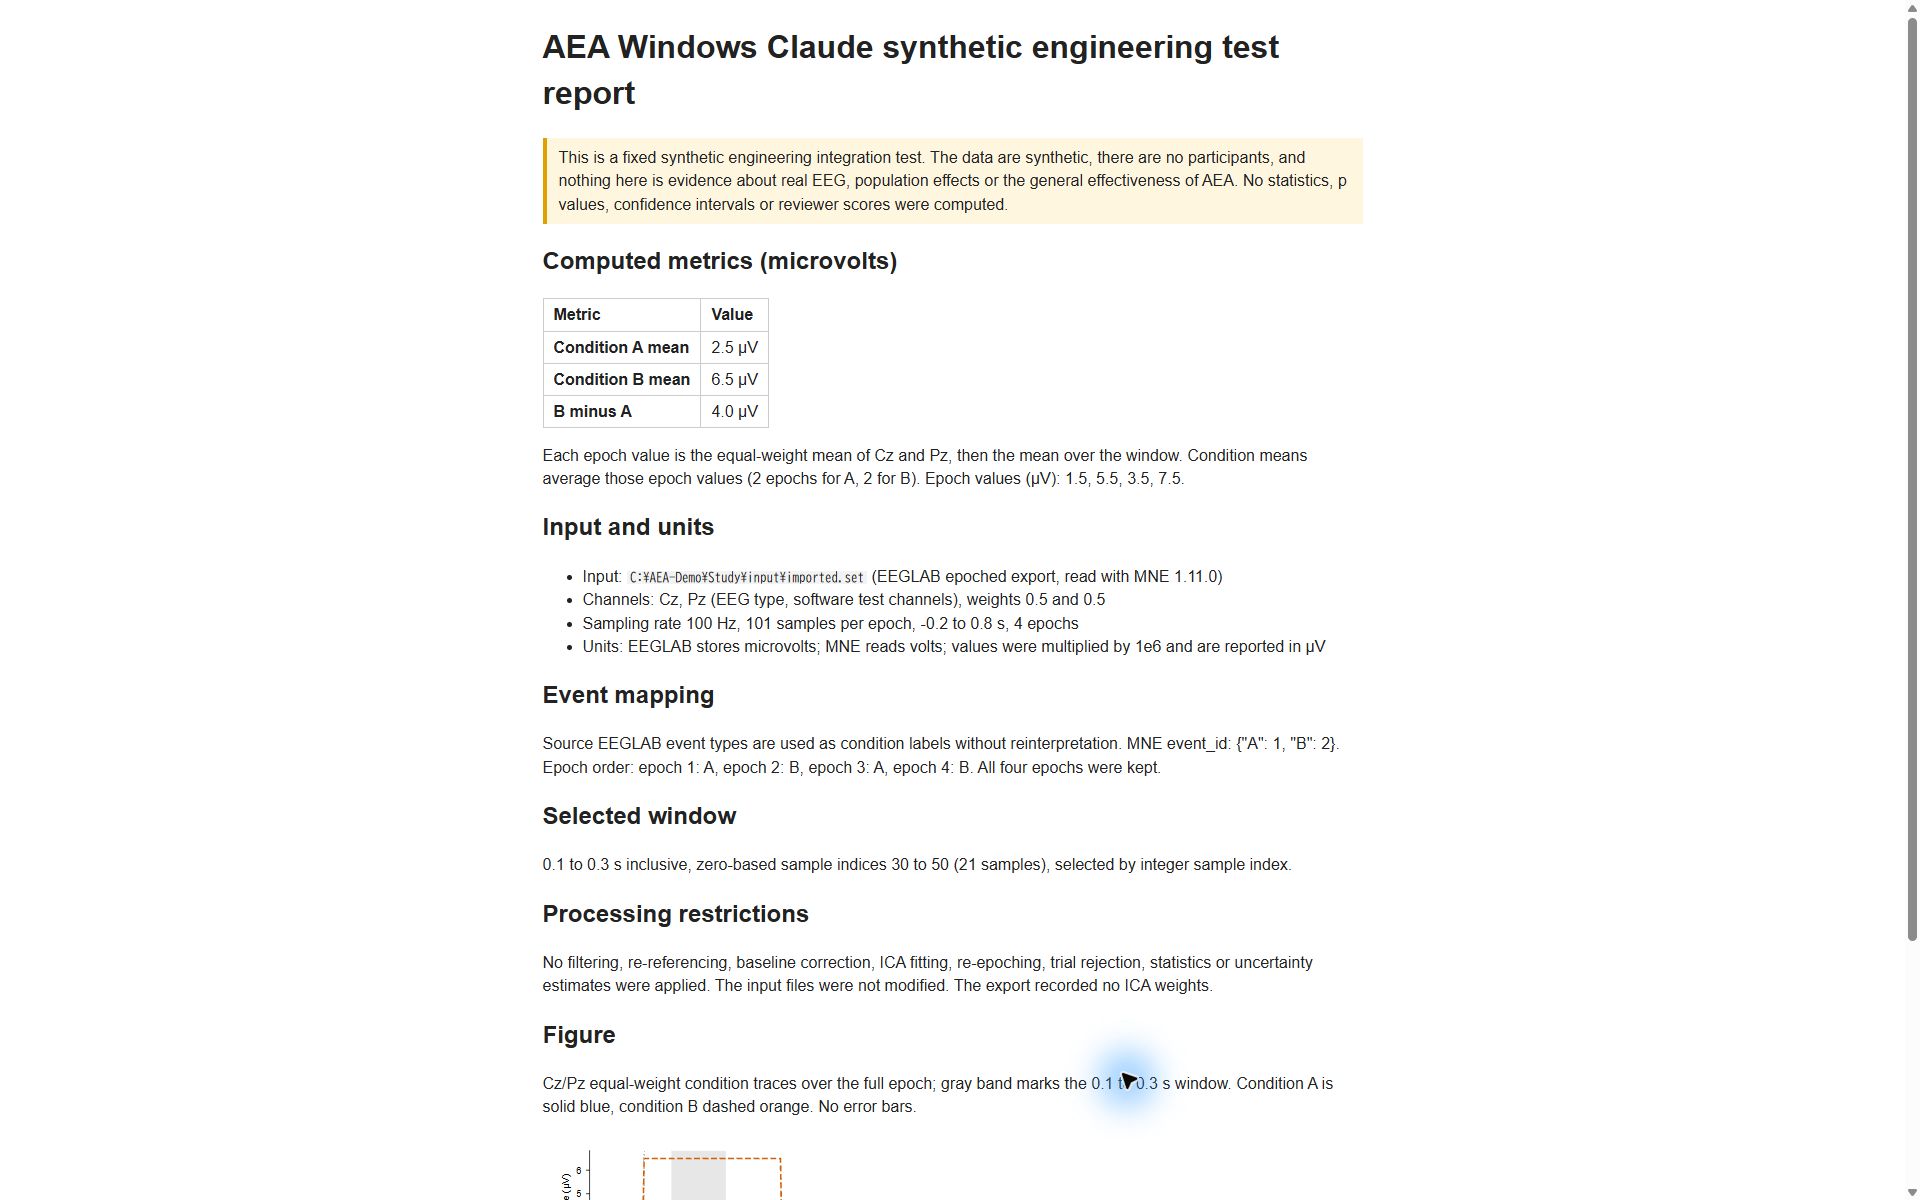
This example is the four-epoch synthetic integration test: its known means are 2.5 µV and 6.5 µV, with B−A equal to 4 µV. The screenshot comes from the completed Windows Claude test, after initial login and terminal setup. It illustrates the report location and display; it is not a real-participant EEG result.
The default full-workflow audit needs a separately configured reviewer, including when Claude runs the analysis. Other file-aware agents have a manual entry point; the plugin’s client selector currently accepts only Codex and Claude.
For startup errors, see Windows client troubleshooting.